Schedule a recording in NowSmart Audio Recorder
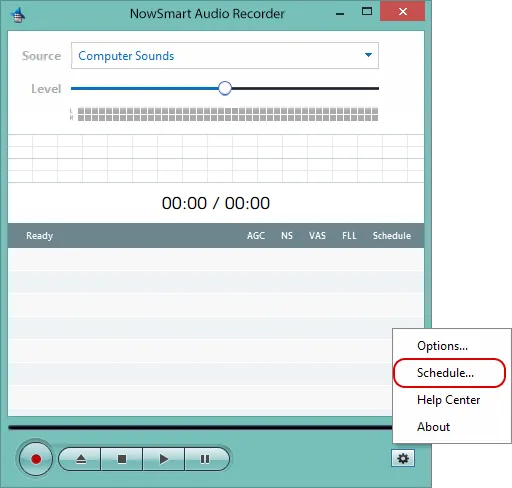
Click Schedule to open the scheduling options.
Adjust the settings, click Enable, and then click OK or Apply.
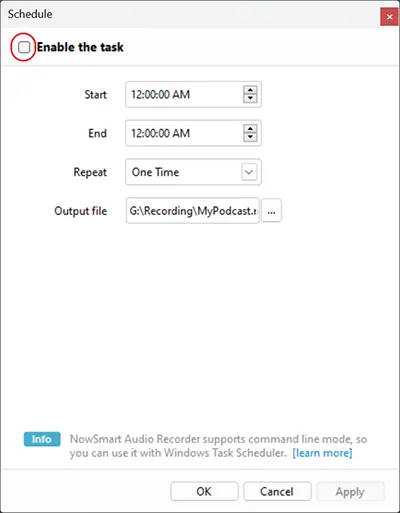
NowSmart Audio Recorder starts recording at the Start time and stops at the End time. To make sure a scheduled recording works:
- Check that the right recording device is selected by making a test recording.
- Test the schedule: for a quick test, schedule a recording that starts in the next minute and ends a few minutes later.
- Leave NowSmart Audio Recorder open, because it cannot launch itself. Make sure the computer does not sleep or hibernate during the scheduled time.
Use Windows Task Scheduler
NowSmart Audio Recorder supports command-line parameters, so Windows Task Scheduler can start recordings for more flexible schedules.
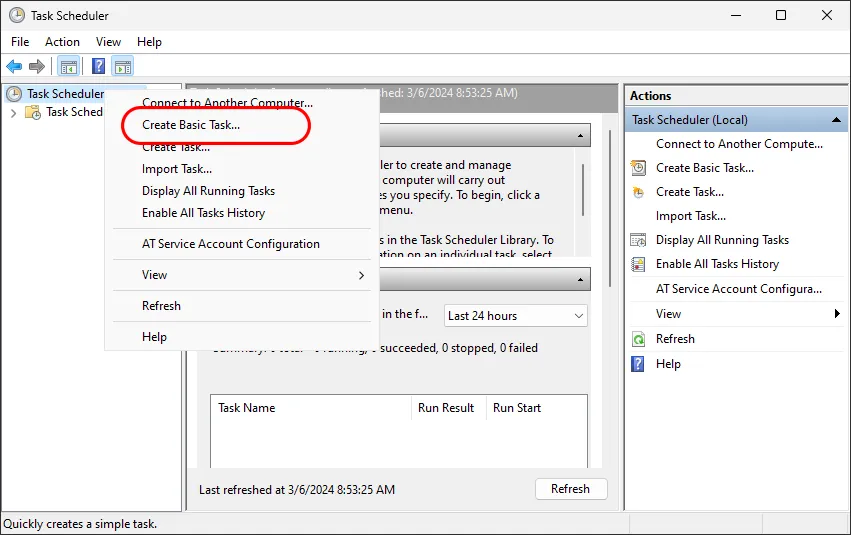
To open Task Scheduler, type Task Scheduler in Windows Search, because its location differs between Windows versions. Right-click Task Scheduler (Local) and select Create Basic Task…
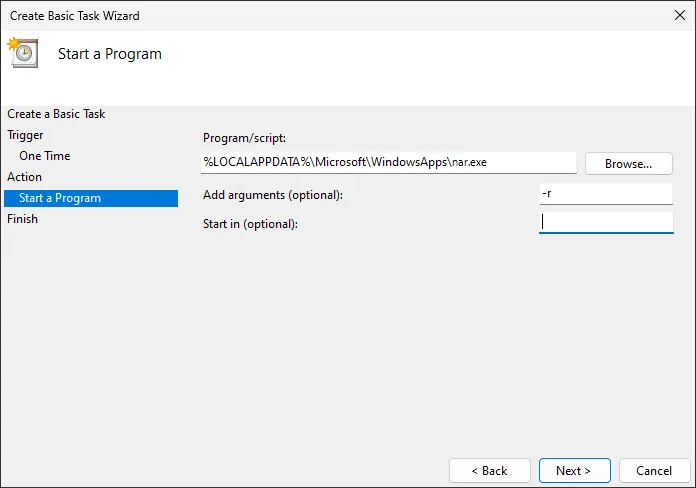
When Task Scheduler asks which action the task should perform, select Start a program. Then:
- Enter the path to nar.exe in Program/script:
%LOCALAPPDATA%\Microsoft\WindowsApps\nar.exe - Add the parameters you need, such as
-r.
Before relying on the task, test it, for example by scheduling it to start in the next minute.
Related articles
Still need help? Browse all NowSmart Audio Recorder articles or contact support.
Start with the free version
The free version of NowSmart Audio Recorder records up to 5 minutes per file. NowSmart Audio Recorder Pro removes the limit and adds Trim for a one-time USD 9.99.