Recording audio using a standard microphone
Whether you're a student looking to record lectures for review, a professional needing to capture the audio of a meeting, someone wanting to record a voice message, sing at home, or even create an audiobook for your children to enjoy while you're away, NowSmart Audio Recorder has you covered. It's a versatile voice recording software equipped with several handy features.
VAS, the built-in intelligent silence detector, skips silent sections automatically, making your recordings concise and clear. The Noise Suppression feature works to eliminate background noise, ensuring your voice recordings are crystal clear. Additionally, the Auto Gain Control adjusts the recording level to ensure consistent audio quality.
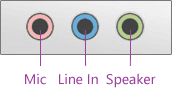
Step 1: Plug your microphone into the Mic jack on your sound card.
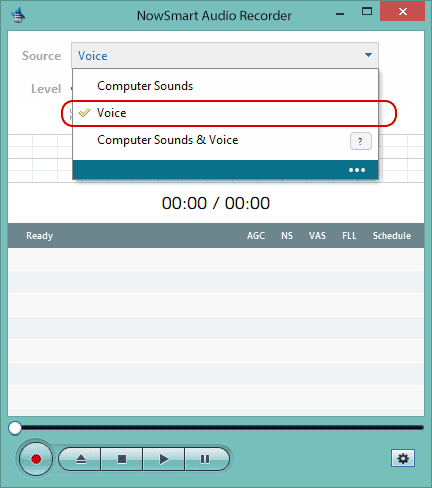
Step 2: Select the Correct Audio Source.
If your microphone is the system default recording device, simply choose Voice as the source.
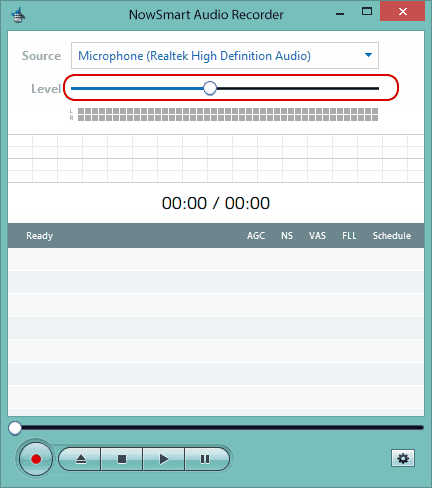
If it's not, switch to Advance mode and select the correct microphone, such as Microphone under the Realtek High Definition Audio section.

Device names vary by manufacturer, so look out for labels like Microphone, Mic, or Mic Volume.
Step 3: Name Your Audio File (Optional).
Click the Add/New button to select an audio file or to name a new one, like test.mp3, test.wav, or test.flac.

NowSmart Audio Recorder will save the recorded sounds directly to this file. You can play back the recorded audio with any media player software on your computer.
Step 4: Begin Recording
Press the Record button to start.

Adjust the recording volume as needed.
Step 5: Optimize Your Recording (Optional).
Open Options
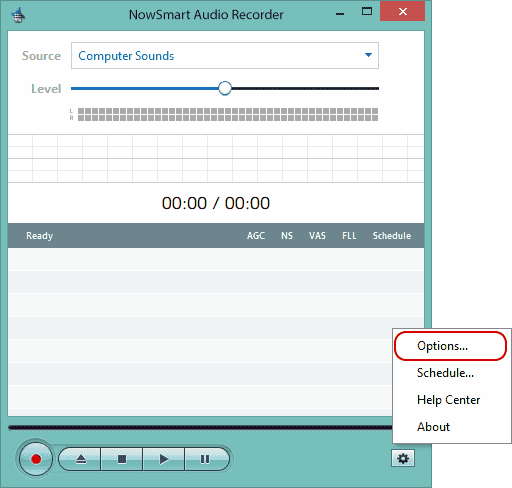
Enable Auto Gain Control and Noise Suppression as needed for optimal recording quality.
